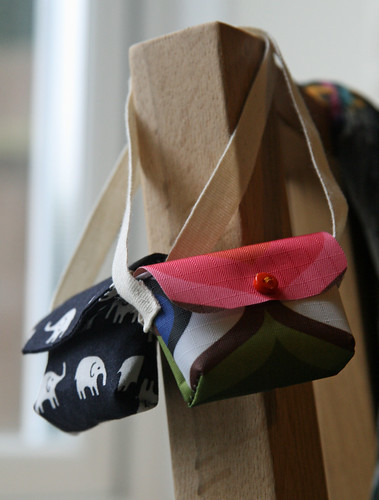
These bags are dead simple to make and very speedy. Best of all, they take a tiny amount of fabric; the bag on the right was made with a sample swatch from one of my favourite fabric stores. Although I'm hoping they'll be the perfect size for Makies, Blythe will probably also covet them (although you may need to lengthen the strap to go over her head... hehehe...)
To start with, you're going to need to gather some stuff together. Here is the stuff you need:

A gathering of STUFF
On the 'essential list', we have fabric scraps (a bit 4 by 6 inches or so should be large enough), a piece of ribbon or cotton twill tape about 10 inches long, sewing needles and thread, a pair of scissors and the bag templates, a PDF of which has been thoughtfully provided by your thoughtful author and designer, aren't I lovely? All you need to do is print out near-enough to A4 size and snip the shapes.
You might want to add a couple of things from the 'not essential but highly recommended' list: tiny buttons, a sewing machine and an iron, a wet Welsh bank holiday weekend, a cup of tea and some tasty snacks from graze.com. Honey and lemon oatcakes particularly highly recommended.
On with making the bag!
First, cut out your bag templates from the PDF, then cut out your fabric. You need one of the 'bag bit' and two of the 'flappy bit'. All of the pieces could be the same fabric, or different fabrics.
With the right sides of the fabric facing each other (elephants in, in this case), sew a 'u' shape around the edge of the bag flap about 1/4 of an inch away from the edge. Turn right side out and iron flat. If it's not too easy to get the flap to lie flat, you may need to notch the edges.
With the right sides of the fabric facing each other (elephants in, in this case), sew a 'u' shape around the edge of the bag flap about 1/4 of an inch away from the edge. Turn right side out and iron flat. If it's not too easy to get the flap to lie flat, you may need to notch the edges.


Once the flap is nicely flat, pin it with the open edge along one of the short ends of the bag bit. Doesn't matter which, as long as the right sides are together at this point. Sew the flap and bag together, 1/4" away from the edge. Then turn the other short end under 1/4" and stitch down so it is nice and neat. The easiest way to do this is to iron it first.
Next. turn the bag into a bag. This is dead easy. With the flap sticking out, fold the long piece in half, right side to right side, and stitch down either side with a 1/4" seam.

Next. turn the bag into a bag. This is dead easy. With the flap sticking out, fold the long piece in half, right side to right side, and stitch down either side with a 1/4" seam.
Stitch down the sides to make your bag.
Before turning the bag inside out, we're going to 'box' the corners. This gives the bag more shape. With your crazy alien hand on the side seam, squish the bottom corner of the bag flat so you make a triangle shape. Stick a pin across it (see picture below left) and do the same with the other corner. Sew across the corners about 3/8ths of an inch away from the point. Your bag should look like it has 'ears, as in the photo on the right below.


Now turn your bag inside out and admire its boxy-baggyness! Oh, and pause to make faces at the tiny robin that's peering at you from the fence...
Now turn your bag inside out and admire its boxy-baggyness! Oh, and pause to make faces at the tiny robin that's peering at you from the fence...
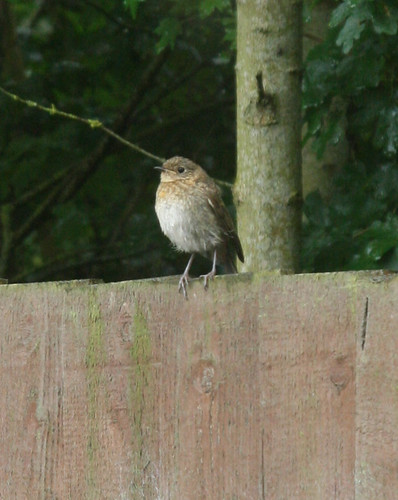
Evil blighter of a robin juvenile.
(As an aside, we have three of these little blighters in the garden and they're complete brutes, even at their tender young age. I blame the parents, who have incidentally been known to take on jackdaws. That's like you or I picking a fight with a cinema.)
Your bag is nearly done! Make another cup of tea in celebration, then attach the strap. Although you can do this using the sewing machine if you're a complete sadist, it's far easier to stitch them on by hand. Simply fold under the last half inch or so of the ribbon and secure with a few stitches. On the elebag, I decided that some embellishment with a tiny button was due at this point and indeed, the point on the opposite side of the bag.
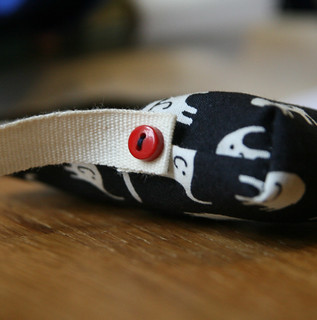
Tiny buttons, whee!
Now you can figure out how you're going to close your bag. I suggest using snaps (poppers to us UK folk) or velcro and NOT, as your humble author was moved to do, form a temporary closure with double-sided sticky tape*.

If you can't see the tape, I didn't use it, right?
So there you have it. A bag fit for a fashionista. Or a geek. Or a scientist. Or a teacher. Or an astronaut. Or a chef. Or a... well. Whatever you want your Makie to be!
*it was cold, it was raining, I'd lost my velcro and I wanted to take photos. I'm not a *bad* maker-person, I'm just aware of my limitations when it's 4:00pm and I'm still in my pyjamas, alright?!
As with anything free on t'internet, this pattern and tutorial are provided on the basis that you don't use them for personal gain or to further the causes of evil and that you're a courteous linker-back from any finished products.
I have no affiliation with Makie Lab, I just think what they do is really cool.
No comments:
Post a Comment